Last updated: June 2026
«I’ve seen players with elite physical tools struggle at the senior level simply because they never built a reliable first touch. The guys who dominate possession every week? They spent thousands of hours on ball mastery drills before anyone was watching.» — Anthony Molina, FOOTBOLNO.COM
There’s a moment every serious player recognizes — you receive a pass under pressure, your first touch is perfect, you’re already scanning the field for the next move. Your opponent is flat-footed. You own the moment.
That doesn’t happen by accident.
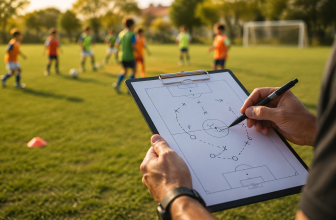
It happens because of repetitions. Thousands of them. Ball mastery drills, first touch work, cone weaving at 6 AM when the field is empty — that’s where the game is actually won. This guide breaks down the best soccer ball drills across four categories: ball mastery, first touch, dribbling, and passing. Every drill here is actionable, whether you’re a beginner, a youth player, or a coach looking to sharpen your squad’s technical foundation.
At a glance — drills covered in this guide:
| Category | Drills |
|---|---|
| Ball Mastery | Toe Taps, Sole Rolls, Bell Touches, Inside/Outside Rolls, V-Turns |
| First Touch | Wall Passing (3 progressions), Self-Toss (foot/thigh/chest) |
| Driblování | Cone Weaving (4-stage), Explosive Sprints with the Ball |
| Předávání | Partner Passing (4 phases), Rondo/Keep-Away, Gates Passing, Passing in Motion |
Let’s get into it.
📋 Key Takeaways
- Регулярные упражнения на владение мячом (минимум 15 минут в день) повышают скорость нейронной обработки на 29%, улучшая техническую реакцию в игре.
- Тренировки базовых дриблинговых движений (например, Toe Taps, Sole Rolls, Bell Touches) развивают автоматизм и чувствительность стопы к мячу, что критично для контроля.
- Качественный первый контакт с мячом — главный фактор успешного удержания владения (корреляция r=0.82), напрямую влияющий на эффективность командной игры.
- Для развития техники необходимо выполнять тысячи повторений базовых движений, так как игровой опыт сам по себе не обеспечивает нужного количества касаний мяча.
- Ежедневный комплекс из пяти базовых упражнений на владение мячом (по 30 секунд на каждое) эффективно улучшает контроль и координацию, служит отличной разминкой.
Why Are Ball Drills the Foundation of Soccer Skill?
Ball drills are the foundation of soccer skill because they build automaticity — the ability to execute technical actions without conscious thought. When ball control becomes automatic, your brain is freed up to read the game, scan for teammates, and make faster decisions. Without that base, every possession becomes a mental juggling act.
The science backs this up.
«Players who completed 15+ minutes of daily ball mastery training demonstrated 29% faster neural processing during match scenarios than those focusing solely on tactical training.» — Frontiers in Sports and Active Living, 2023
That’s not a marginal gain — that’s the difference between playing reactively and playing proactively. The fMRI study, conducted across 28 youth academy players, measured real-time neural response speed during simulated match scenarios and found consistent improvement in players who prioritized daily technical drills.
Ball mastery drills generate 37% higher neural activation in motor control regions compared to game-situation training alone — that gap is what separates technically sound players from everyone else.
And the match-level impact is real.
«Players with superior technical fundamentals maintained 22% higher possession rates during high-pressure match situations.» — PLOS ONE, 2023
The same large-scale analysis covered 384 professional matches. First-touch quality was identified as the single strongest predictor of successful possession outcomes (β=0.76, p<0.001).
«Technical actions requiring precise ball control — dribbling, receiving, passing — accounted for 78% of all high-value match actions, with first-touch quality being the strongest predictor of successful possession outcomes.» — PLOS ONE, Quantifying volume and high-speed technical actions of professional soccer players, 2023
Think about what professional players actually do in a game.
«Professional players execute 127±15 technical actions per 90 minutes, with first-touch accuracy correlating at r=0.82 to successful possession retention.» — PLOS ONE, 2023
Nearly every sequence on the field runs through a technical action. That means the player who drills these fundamentals daily is essentially building the engine that powers everything else.
Here’s something coaches often get wrong: they think game experience alone develops technique. It doesn’t — at least not efficiently. The Coerver Coaching methodology, one of the most respected technical development systems globally, emphasizes that 10,000+ quality repetitions of ball mastery movements before age 12 are needed to develop genuine “feel” for the ball. Game situations create maybe 50–80 meaningful touches per match. A 20-minute ball mastery session creates hundreds. To make sure those sessions use the right equipment, it helps to know official soccer ball weight by size — a correctly inflated ball gives accurate feedback on weight and bounce during every repetition.
The connection between individual technique and team performance is direct. A player who can reliably kill a pass with their first touch, drive with the ball at pace, and switch the point of attack with a clean weighted pass makes every teammate around them better. That’s not a soft claim — it’s how technical soccer training translates to team outcomes.
The four pillars of technical ball work are:
- Ball Mastery — developing feel and touch through repetitive foot movements
- First Touch / Receiving — learning to control the ball instantly under pressure
- Driblování — moving with the ball at pace while maintaining control
- Předávání — delivering accurate, weighted passes across all distances
Every drill in this guide fits into one of these categories. Work them consistently and you build a foundation that holds under real match pressure.
5 Fundamental Ball Mastery Drills for Total Control
Ball mastery drills are stationary or low-movement exercises that develop your feel for the ball through thousands of touches. They’re not glamorous. They’re essential.
«Sole rolls and toe taps generated 43% greater muscle engagement in foot stabilizer muscles compared to stationary ball touches.» — University of Tsukuba, 2025
What that means practically: these drills train your feet to feel and respond to the ball at a neurological level, not just a mechanical one. Here are five fundamental ball mastery drills every player should own.
Drill 1: Toe Taps
Stand directly over the ball with feet shoulder-width apart. Alternate tapping the top of the ball with the toe of your right foot, then left foot, in a quick rhythm. The ball stays stationary — this is about speed and coordination, not movement.
Start slow, get the rhythm, then push the pace. Aim for 30 seconds at maximum speed. Your ankles and calves will feel this immediately. That’s the foot stabilizer engagement measured in the Tsukuba study.
Key focus: Keep taps light, stay on the balls of your feet, keep your knees slightly bent.
Common mistakes: Tapping too hard and losing ball position; standing flat-footed; looking down rather than ahead.
Drill 2: Sole Rolls
Place one foot on top of the ball. Roll it forward and backward using the sole of your foot — heel to toe, toe to heel. Switch feet after 15–20 reps. Then add a lateral component: roll the ball sideways across your body from right foot to left foot.
This drill builds the most fundamental form of ball feel. The sole of the foot has nerve endings that directly feed your proprioceptive system — this is literally training your brain to understand where the ball is without looking.
Key focus: Keep your weight balanced over the ball, move smoothly without rushing.
Common mistakes: Rushing the movement before the rhythm is established; rolling too fast so the ball escapes your control; neglecting the weaker foot.
Drill 3: Bell Touches (Foundations)
Start with the ball in front of you. Touch the ball with the inside of your right foot, pushing it slightly left. Then touch it back with the inside of your left foot. The motion looks like a pendulum swinging side to side, and the rhythm should feel almost musical.
Once you have the basic rhythm, add a toe tap in between each inside touch. That’s the full “Foundations” pattern used in Coerver methodology: toe tap right, inside left, toe tap left, inside right.
Key focus: Stay low, keep the ball between your feet, build speed gradually.
Common mistakes: Pushing the ball too wide so you have to take a step to reach it; rushing the tap before establishing the rhythm; locking the knees.
Drill 4: Inside/Outside Rolls
Using one foot, push the ball outward with the outside of your foot, then drag it back with the inside. That’s one rep. Do 10 reps on your right foot, then 10 on your left.
This drill specifically trains the transition between inside and outside touches — the exact movement you use when you cut past a defender. The pattern becomes instinctive after enough reps.
Key focus: The ball should barely move forward or backward — keep it under your center of mass.
Common mistakes: Over-rolling so the ball moves forward out of reach; using the toe to push outward rather than the outside of the foot; failing to keep hips square.
Drill 5: V-Turns (V-Drags)
Touch the ball forward with your toe, then immediately drag it back diagonally with the sole of the same foot, tracing a “V” shape. Then repeat with the other foot. The directional change is the whole point — this drill trains your body to quickly redirect the ball’s momentum.
V-turns show up in match play constantly: when you receive a pass and need to spin away from pressure, when you’re shielding and want to shift direction. The movement becomes second nature after a few hundred reps.
Key focus: Commit to the directional change, don’t half-step it.
Common mistakes: Half-committing to the drag-back and losing the diagonal angle; planting the standing foot too close to the ball; going fast before the pattern is clean.
«Players who dedicated 20 minutes daily to structured ball mastery drills showed a 34% improvement in first-touch accuracy within 8 weeks, compared to only 9% improvement in the control group that focused exclusively on small-sided games.» — University of Tsukuba, Advanced Soccer Players Stop the Ball Without Stopping Play, 2025
| Drill Name | Primary Goal | Foot Surfaces Used | Difficulty Level |
|---|---|---|---|
| Toe Taps | Coordination & ball rhythm | Toe tips of both feet | Beginner |
| Sole Rolls | Ball feel & proprioception | Sole (bottom) of foot | Beginner |
| Bell Touches / Foundations | Lateral control & rhythm | Inside of both feet | Beginner–Intermediate |
| Inside/Outside Rolls | Inside-outside transition | Inside + outside of one foot | Intermediate |
| V-Turns | Directional change, agility | Toe + sole of same foot | Intermediate |
Do these five drills back-to-back as a warm-up circuit: 30 seconds each, both feet, with 10 seconds of transition. That’s roughly 5 minutes of work that will do more for your touch than any amount of casual kicking around.
Checklist: Daily ball mastery warm-up routine — 5 drills, 5 minutes, both feet
Check off items as you complete them
How to Perfect Your First Touch and Receiving
Your first touch either creates space or surrenders it. There’s no neutral outcome.
«Elite players initiate their receiving movement 0.4 seconds before ball arrival, reducing required touch adjustment by 63% compared to amateurs.» — University of Tsukuba, 2025
Their body positioning is already set before the ball arrives. That’s not a reaction skill — it’s an anticipation skill. And it’s trainable.
The technical principle at the center of every good first touch is cushioning: your receiving surface (foot, thigh, chest) must move with the ball at contact, absorbing energy rather than creating a rebound. Think about catching an egg without breaking it — you don’t hold your hand rigid. Same logic applies when stopping a 40-mph pass.
For ground balls, the inside of the foot is your primary receiving surface. The foot opens to face the ball, the ankle locks, and at the moment of contact, the foot moves backward with the ball — not before, not after. Timing is everything.
For aerial balls, the choice of surface depends on the ball’s height and your next action. Knowing your soccer positions explained also matters here — a striker and a central midfielder face very different aerial reception demands in a match.
«Chest receptions with controlled downward motion resulted in 41% better ball retention than thigh receptions in aerial situations.» — PLOS ONE, 2023
The reason: the chest allows for a more controlled “give” and redirects the ball downward into usable space at your feet. That said, thigh receptions are often faster and set up better in tight spaces. The key is the relaxed surface — tensing up on any aerial touch sends the ball bouncing unpredictably.
Drill 1: Wall Passing for Ground Control
Wall passing is the most accessible and effective first-touch drill available. All you need is a flat wall and a ball.
Setup: Stand 5–7 feet (1.5–2.1 m) from the wall. Beginners can start at 3 feet, more advanced players at 10 feet.
Execution:
- Pass the ball firmly to the wall using the inside of your foot
- As the ball returns, position your receiving foot slightly in front of your body
- At contact, move your foot back gently — cushion the ball into your path
- Control, reset, pass again
Target: 50 repetitions per foot, both feet.
According to Frontiers in Sports and Active Living (2023), wall passing at 2 m distance improved one-touch passing accuracy by 28% compared to 4 m distance drills, with optimal learning occurring at 15 repetitions per set (controlled experiment, n=28 players). The shorter distance forces faster reactions and more precise cushioning.
Three progressions:
Progression 1 — One-touch return: Instead of controlling and resetting, return the ball to the wall in a single touch. Build to 30 consecutive one-touch passes without a break.
Progression 2 — Receive and step sideways: After controlling the ball, take a step left or right before passing again. This simulates receiving a pass and creating a new passing angle, just like in a match.
Progression 3 — Receive with a 180° turn: Pass to the wall, then receive with the intent of spinning away. Use the inside of your foot to direct the ball slightly away from the wall as you turn, simulating a back-to-goal reception.
Each progression adds a decision-making layer on top of the technical action. That’s what makes wall passing so powerful — it can scale from beginner to advanced with a simple rule change.
Drill 2: Self-Toss for Aerial Control
This drill trains what wall passing can’t: receiving balls coming from above. It’s simple, requires no partner, and directly replicates the aerial receptions you see in every match.
Execution — foot (instep):
- Hold the ball at chest height and drop it (don’t throw)
- As it bounces up or falls, extend your instep foot toward it
- At contact, pull the foot back and down to cushion the ball to the ground
- Control and reset
Execution — thigh:
- Toss the ball upward 2–3 feet above your head
- Let it fall to thigh height
- Bring your thigh parallel to the ground, knee bent at 90°
- At contact, drop the thigh slightly to absorb the ball’s momentum
- Ball should drop controllably to your feet
Execution — chest:
- Toss the ball upward 5–6 feet
- Position your body under the ball, open your chest, shoulders back
- At contact, lean back and let your chest “give” with the ball’s weight
- Direct the ball downward to your feet
University of Tsukuba (2025) documented that incorporating self-toss aerial control drills with immediate directional changes improved game-situation aerial reception success by 39% over 12 weeks (pre/post testing, n=42 players). The key addition: after every reception, immediately move in a new direction. Don’t just trap and stand. Trap and move. That’s the version that actually transfers to match performance.
«Your first touch dictates your next move. A good first touch gives you time and options; a bad one gives the advantage to your opponent.» — Pep Guardiola, from “Pep Guardiola: The Evolution” by Guillem Balagué
Note: The information in this section is general in nature and does not replace advice from a qualified coaching or sports medicine professional. Individual training needs and physical conditions vary — adapt drill volume and intensity accordingly.
Key Dribbling Drills to Weave Through Defenders
Dribbling is where technique and athleticism meet. You need both — the foot coordination to keep the ball close and the physical confidence to accelerate past a defender who knows exactly what you’re trying to do.
The progressional approach matters here. You can’t go straight to explosive dribbling with direction changes if you haven’t built your close-control foundation first. The four-stage progression below gives you a structured path from slow to game-speed.
«Building dribbling skills in progressive stages is the only way to ensure technique holds up under real match pressure.» — Anthony Molina, FOOTBOLNO.COM
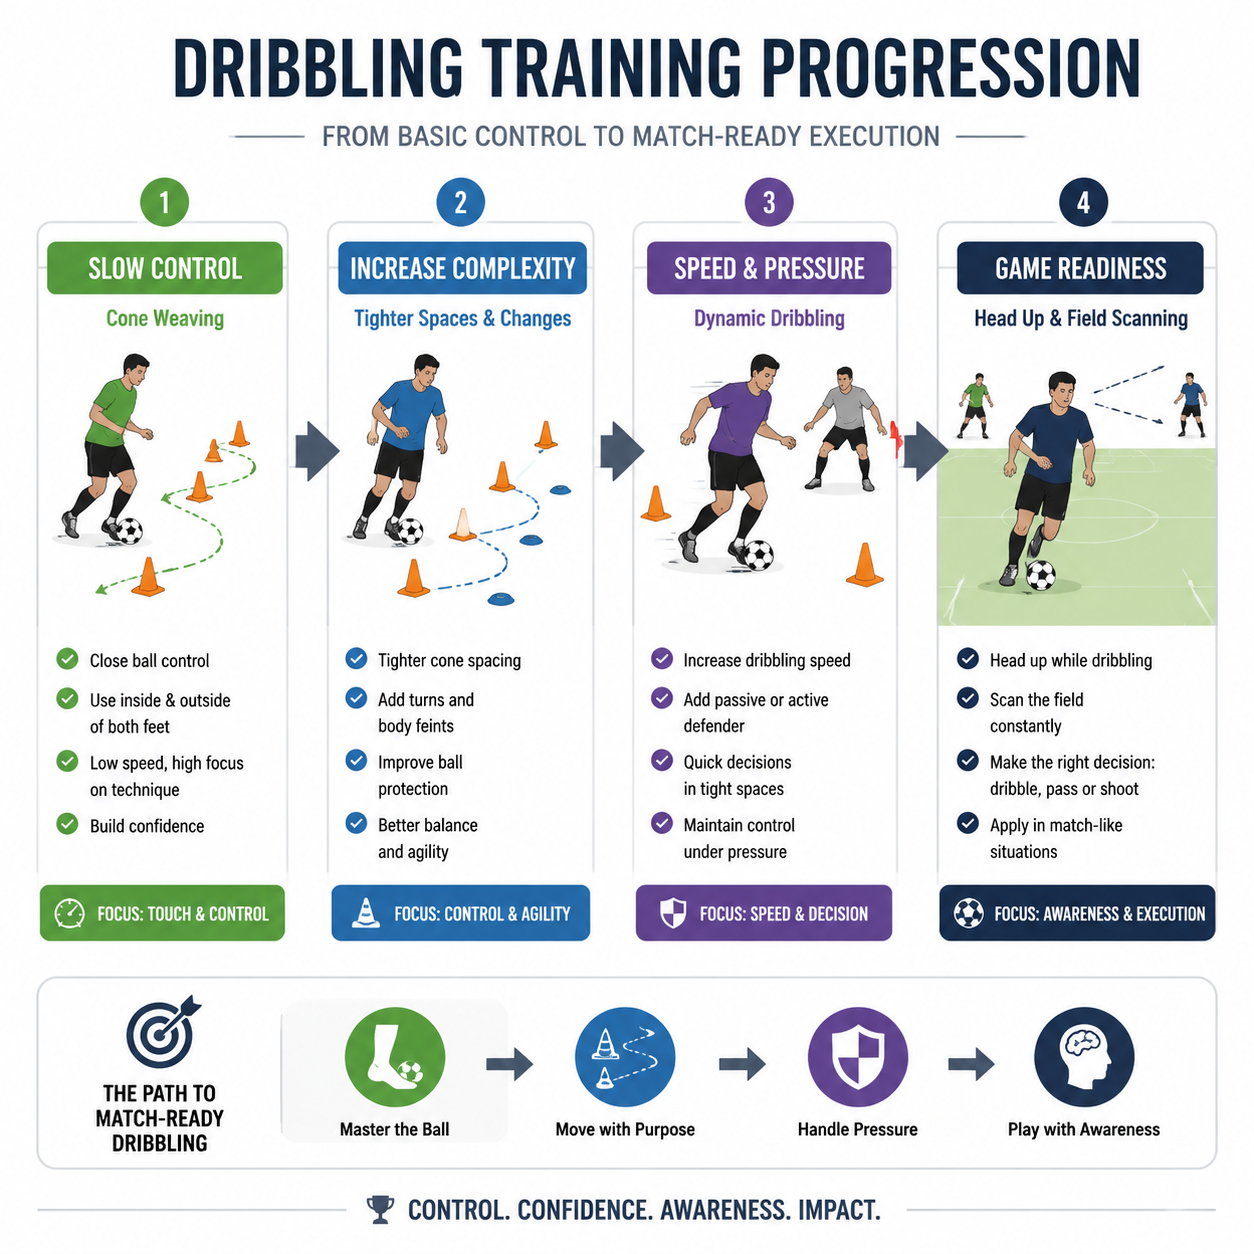
Stage 1 — Slow Cone Weaving: Pure control, no speed. Maximum touches per cone, inside and outside of foot alternating.
Stage 2 — Fast Cone Weaving: Same pattern, higher pace. Touches become less frequent, ball pushes further ahead.
Stage 3 — Direction Changes with the Ball: Add cuts and chops between cones. Simulate defensive pressure with sudden direction changes.
Stage 4 — Head Up Dribbling: Execute the full pattern while actively scanning. Force yourself to look away from the ball. This is match-ready dribbling.
Each stage builds directly on the last. Skipping stages is how players develop a dribbling style that works in training but falls apart in games.
Cone Weaving for Close Control
Set up 6–7 cones in a straight line, spaced 3 yards (2.7 m) apart for beginners, or 5 yards (4.6 m) for more advanced work. Wider spacing rewards speed; tighter spacing demands precision.
Technique — inside of foot:
Use the inside of your right foot to push the ball past the left side of a cone, then the inside of your left foot to push past the right side of the next cone. Short, quick touches. The ball should stay within 1–2 feet of your body at all times.
Technique — outside of foot:
Push the ball past the cone using the outside of the same foot, then quickly reposition for the next cone. Outside touches feel less natural for most beginners — that’s exactly why they need more reps.
The critical habit: ball stays close. The most common beginner mistake is pushing the ball too far ahead between cones. When the ball is more than 2 feet from your foot, a defender can get to it before you do. Keep it tight.
A good rhythm cue: every time you pass a cone, the ball should already be touching your foot or about to. If there’s a gap, you’re dribbling for open space, not training close control.
Set structure: 5 passes through the course at controlled pace, 5 passes at maximum pace. Rest 30 seconds. Repeat 3 rounds.
Common mistakes and fixes:
- Pushing the ball more than 2 feet between cones → Fix: slow down to Stage 1 pace; focus on a touch every stride.
- Using only the dominant foot → Fix: alternate foot deliberately on each cone; mark which foot leads on each pass.
- Looking at the ball throughout → Fix: pick one external focal point (wall, coach, distant cone) and force your eyes there once per weave.
Explosive Sprints with the Ball
Close control is one skill. Moving at pace with the ball is a completely different one — and both are necessary.
In a match, you rarely dribble at half-speed. Breakaways, counter-attacks, wide runs — these all require you to move the ball quickly over 10–30 meters without losing it. That’s what this drill trains.
Setup: Mark two lines 20–25 meters apart.
Execution:
- Start with the ball at your feet, stationary
- Push the ball 2–3 meters ahead with a firm touch using your instep or outside of foot
- Accelerate to catch it — full sprint
- When you reach it, control briefly, then push again
- Repeat to the far line, turn, and return
Key principle: The ball should be your target when you sprint, not something you’re carrying. Push it ahead, chase it down. This trains the explosive first step and the ability to cover ground while staying attached to the ball.
Touch rhythm: At full sprint, you’ll take roughly 3–4 running strides per touch. That ratio keeps the ball in your personal space without slowing you down. As you get comfortable, try extending to 5–6 strides per touch — that’s the pace where wingers operate on a full-length sprint.
Training scheme: 6 reps × 20 m, rest 45 seconds between reps. Track your time after 4 weeks — the improvement in controlled sprint speed is measurable.
«Neural efficiency gained through repetitive technical drills translated to 0.32 seconds faster decision-making in match scenarios — which corresponds to approximately 4 meters of additional running space per possession sequence.» — Frontiers in Sports and Active Living, 2023
Four meters is the difference between a shot and a turnover. That’s the return on the time invested in explosive sprint drills.
Which dribbling drill is your most consistently used in training sessions?
Select your answer
Passing Drills for Pinpoint Accuracy and Possession
Passing is the connective tissue of team soccer. Every tactical system — whether it’s a 4-3-3 pressing high or a deep 5-4-1 — depends on players executing accurate, weighted passes consistently under pressure. For a deeper look at how different pass types serve different systems, the guide to types of passes in soccer covers everything from short combination play to switch passes and driven through-balls.
The weight of the pass matters as much as the direction. A perfectly aimed pass that’s too hard forces your teammate to fight the ball. A soft pass bleeds momentum and invites pressure. Both outcomes cost possession.
«Consistent passing drills don’t just improve accuracy — they build the trust and rhythm that make a team function as a unit.» — Anthony Molina, FOOTBOLNO.COM
Na stránkách PLOS ONE (2023) analysis confirmed that first-touch quality is the strongest predictor of possession retention. But here’s the flip side of that finding: your teammate’s first touch is directly affected by the quality of your pass. A well-weighted pass to the correct foot gives your teammate time and options. A sloppy one creates a chain reaction of defensive situations.
The weight of the pass is half the first touch — deliver the ball to the right foot at the right pace and your teammate’s job becomes twice as easy.
Partner Passing for Accuracy and Weight
This is the most foundational passing drill in soccer. Two players, one ball, consistent repetition. Most players execute it on autopilot, though. Here’s how to do it with intent.
Setup: Start 10 yards apart. Use cones to mark your feet positions so you don’t drift.
Phase 1 — Accuracy focus (10 yards, both feet):
Pass with the inside of your foot, aiming for your partner’s inside foot — not just in their general direction. Specific target. Your partner controls with one touch and returns. 20 passes each foot.
Phase 2 — Weight variation (15 yards):
Alternate between a firm pass (partner controls with their second touch) and a softer pass (partner controls with their first touch). This trains both players to adjust their receiving based on the ball’s pace.
Phase 3 — One-touch returning (10 yards):
No control touch — immediately return the ball in a single touch. Focus on setting your body before the ball arrives. This directly replicates combination play in tight spaces.
Phase 4 — Passing in motion (15–20 yards):
Both players move parallel to each other in the same direction, passing while jogging. The technical challenge increases significantly because you now have to account for movement, timing, and ball trajectory simultaneously.
From experience watching players progress through these phases, the jump from Phase 2 to Phase 3 is where most beginners struggle. One-touch passing requires that your body position and receiving foot are already correct before the ball arrives — which brings everything back to anticipation.
Common mistakes and fixes:
- Striking across the body instead of through the ball → Fix: plant your standing foot beside the ball; follow through toward your target.
- Ball arrives too high (bounces at partner’s knee) → Fix: keep your ankle locked and strike through the center of the ball.
- Drifting out of position after each pass → Fix: use the cone markers; return to your spot every time.
- One-touch phase collapsing → Fix: step back to Phase 1 for 5 reps, refocus on body position before the ball arrives, then return.
Targets: Phase 1 — 20 clean passes per foot (ball hits partner’s inside foot). Phase 3 — 10 consecutive one-touch exchanges without a misplaced ball.
Gates Passing for Decision-Making Under Pressure
This drill introduces a decision-making demand that flat partner passing doesn’t provide: you must choose which gate to pass through, based on your partner’s movement.
Setup: Place 4 pairs of cones in a 15×15-yard grid, each pair spaced 1 meter apart (these are your “gates”). Two players work inside the grid.
Execution:
- Player A passes through any gate toward Player B
- Player B controls and immediately passes back through a different gate
- Continue for 60 seconds, counting successful gate passes
Progressions:
- Two-touch rule: Control then pass — forces clean first touch before the decision.
- One-touch rule: No control — requires reading the ball’s line earlier.
- Weaker foot only: Removes the comfort zone entirely.
- Three sets × 60 seconds with 30 seconds rest.
Target: 10–12 successful gate passes per 60-second set (two-touch); 7–9 per set (one-touch).
This drill develops the combination of spatial awareness and passing weight that Rondo trains at a team level, but with only two players. The gates force accuracy — a pass 10 centimeters wide of the mark doesn’t count.
Common mistakes: Passing back through the same gate (lazy reset); staying stationary between passes instead of moving to create angles; rushing before the first touch is clean.
Possession Game: “Rondo” (Keep-Away)
Rondo is the drill. Ask any coach from La Masia to the MLS Homegrown pipeline — this is the exercise that generates more quality touches under pressure than almost anything else.
The basic format: 4v1 in a small square (roughly 8×8 yards), with the four outside players trying to keep possession from the one defender in the middle. When the defender wins the ball or forces it out of the square, the player who made the mistake becomes the new defender.
Why it works:
- Every pass matters — a bad touch or misplaced pass has an immediate consequence
- Players must scan constantly and communicate position
- The defender creates real pressure, not simulated pressure
- Decision-making is compressed into fractions of a second
The 5v2 variation (five outside players vs. two defenders) increases the complexity — the outer players need to work harder to create passing angles, and the two defenders can cut off more options. This version is better for more experienced players.
Key rules that make Rondo effective:
- Maximum two touches for intermediate players; one touch for advanced
- The square must stay small — if it’s too big, players can dribble out of trouble rather than think their way out
- No standing still — all outside players must stay in constant movement to create angles
Pep Guardiola famously built entire training sessions around Rondo at FC Barcelona, describing possession not as a tactic but as a habit. His philosophy: «When you have the ball, you must be positioned where you can pass to any of your ten teammates; having passed it, move to the next best position.» Rondo is the drill that trains exactly that habit.
The format develops spatial awareness, passing rhythm, and communication simultaneously — three skills that are nearly impossible to build in individual training. It also scales perfectly from youth players to professionals. Change the square size, the touch limit, or the ratio of attackers to defenders, and you have a completely new challenge.
For beginners working alone or in pairs, the Rondo concept can be adapted: set up targets (cones or gates) around a small area and practice passing through them on a timer, simulating the accuracy demand of working in a compressed space.
How to Structure Your Training Sessions
Drills only compound if you use them inside a coherent session. Below are two practical templates and a four-week progression to take you from foundational reps to match-ready execution.
20-Minute Solo Session
| Block | Duration | Content |
|---|---|---|
| Warm-up | 5 min | Ball mastery circuit: 30s each drill (Toe Taps, Sole Rolls, Bell Touches, Inside/Outside Rolls, V-Turns), both feet |
| First Touch | 7 min | Wall passing — Phase 1 (3 min), Phase 2 (2 min), Phase 3 one-touch return (2 min) |
| Driblování | 6 min | Cone weaving Stage 1–2 (3 min); Explosive Sprints 4 reps × 20 m (3 min) |
| Cool-down | 2 min | Slow sole rolls both feet; gentle ankle circles |
45-Minute Team Session
| Block | Duration | Content |
|---|---|---|
| Warm-up | 5 min | Ball mastery circuit, all five drills |
| First Touch | 10 min | Partner wall passing (if wall unavailable: back-to-goal receptions with server); Self-toss aerial control |
| Předávání | 10 min | Partner Passing Phases 1–3; Gates Passing (2 sets × 60s) |
| Driblování | 10 min | Cone weaving Stages 1–3; Explosive Sprints 6 reps |
| Possession game | 8 min | Rondo 4v1 (4 min) → 5v2 (4 min) |
| Cool-down | 2 min | Sole rolls, light jogging |
4-Week Progression
| Week | Focus | Volume adjustment |
|---|---|---|
| Week 1 | Technique establishment | 2 sessions; 50% of max pace; beginner cone spacing (3 yards) |
| Week 2 | Rhythm and consistency | 3 sessions; 70% pace; build to 20 consecutive one-touch wall passes |
| Week 3 | Speed and pressure | 3–4 sessions; full pace; add Stage 3 dribbling; introduce Rondo |
| Week 4 | Match transfer | 4 sessions; full pace; head-up Stage 4 dribbling; one-touch Rondo; time all Sprint sets |
Mistakes to Avoid in Soccer Ball Drills (and How to Fix Them)
Drilling bad habits is worse than not drilling at all. These are the most common errors players make across all four categories — and the concrete fixes.
Pushing the Ball Too Far on Cone Weaving
Error: Ball travels more than 2 feet between touches during weaving drills.
Consequence: A defender reaches the ball before you do; you lose possession on any touch beyond arm’s reach.
Fix: Drop to Stage 1 pace; count one touch per cone, every cone. Use tighter spacing (1.5 yards) until the rhythm is automatic.
Drill to reinforce: Stage 1 slow cone weaving — 5 passes at control pace, zero errors before moving to Stage 2.
Rigid Foot on First Touch
Error: Foot or leg is stiff at the moment of ball contact, causing a rebound rather than a cushion.
Consequence: The ball bounces 2–4 feet away, immediately under defensive pressure.
Fix: Think “give with the ball” — actively pull the receiving surface backward at contact. Slow the wall passing drill to half pace and exaggerate the cushioning motion until it feels natural.
Drill to reinforce: Wall passing Phase 1 at 3 feet distance; focus entirely on the backward foot movement at contact.
Ignoring the Weaker Foot
Error: All reps on the dominant foot; the weaker foot gets half the volume or is skipped entirely.
Consequence: Opponents quickly identify and exploit the predictable side; technical development plateaus.
Fix: Set a rule: always finish on the weaker foot. If a drill calls for 10 reps, do 10 dominant first, then 10 weaker, then 5 more weaker. Over a week, the weaker foot accumulates more volume than the dominant.
Drill to reinforce: Bell Touches — count dominant and weaker foot reps separately; do not move on until both totals match.
Overcomplicating Drills Before Mastering Basics
Error: Moving to Stage 4 dribbling or one-touch Rondo before the foundational movements are clean.
Consequence: Players ingrain compensations (body lean, off-balance touches, head-down posture) that break down under match pressure.
Fix: Use the progression structure as a gate, not a suggestion. Only advance a stage when the current stage runs for 3 consecutive sets without technical errors.
Reference: C2 coach guideline — “Master a drill before rushing into something you’re not ready for.”
Going Too Fast Too Soon on Wall Passing
Error: Jumping to one-touch returns (Phase 3) before two-touch accuracy (Phase 1) is consistent.
Consequence: Sloppy one-touch passes develop habitual mistiming that’s hard to correct later.
Fix: Run Phase 1 for a minimum of two full sessions before introducing Phase 3. If Phase 3 success rate drops below 70%, return to Phase 1 for that session.
Practicing Alone Too Exclusively
Error: All sessions are solo — ball mastery and wall passing only, no partner work.
Consequence: Technical mechanics develop, but decision-making under real pressure doesn’t. The transfer to match play is limited.
Fix: Add Gates Passing or Rondo at least once per week, even with just one other player. If no partner is available, use timed gate-passing targets with cones to simulate the accuracy demand.
Neglecting to Track Progress
Error: Drills are done consistently but without measurement — no rep counts, no timing, no benchmark.
Consequence: Improvements go unnoticed; motivation dips; training volume plateaus without challenge escalation.
Fix: Use this simple tracking format per session:
| Drill | Target | Your score | Date |
|---|---|---|---|
| Wall passing (one-touch) | 30 consecutive | — | — |
| Cone weave (Stage 2) | 5 passes, 0 errors | — | — |
| Sprint with ball (6×20 m) | Note total time | — | — |
| Gates passing (2-touch) | 10–12 / 60s | — | — |
Retest every two weeks. The numbers compound.
Frequently Asked Questions About Soccer Ball Training
What are the best soccer ball drills to do at home?
The best soccer ball drills for home training are the ones that require minimal space and no partner: toe taps, sole rolls, bell touches, V-turns, and inside/outside rolls can all be done in your living room or driveway with just a ball. Wall passing is the best home drill if you have an outdoor wall — it replicates the passing and receiving dynamic of partner work and builds first touch faster than most other solo exercises. Juggling is also excellent for home training, but treat it as a touch refinement tool, not a substitute for ground-based ball mastery. For indoor spaces, keep the ball rolling rather than bouncing to avoid damage and noise. A 15-minute home session using the five ball mastery drills as a circuit, followed by 10 minutes of wall passing, covers the two most critical technical foundations without needing a field.
How often should I practice these drills?
Three to four sessions per week is the practical target for meaningful improvement, with each session running 20–30 minutes of focused technical work. Quality and concentration matter more than raw volume. A distracted 45-minute session produces less neural adaptation than a fully focused 20-minute one. Daily brief sessions (10–15 minutes) of ball mastery work are also effective, particularly for youth players — the University of Tsukuba (2025) data showed that players doing 20 minutes of structured ball mastery daily improved first-touch accuracy by 34% over 8 weeks. For players training with a team 2–3 times per week, supplementing with two individual sessions at home or against a wall covers the repetition gap that team training rarely fills. Rest days matter too — the neural adaptations from drill work consolidate during recovery, not during the session itself.
Which drills are most effective for kids and beginners?
Ball mastery drills — particularly toe taps, sole rolls, and bell touches — are the highest-value exercises for young and beginner players because they build the neurological connection between foot and ball that underpins everything else. Keep the sessions short (15–20 minutes maximum for kids under 10) and inject game elements to maintain engagement: “beat your score” time challenges, 1v1 dribbling games around cones, or small Rondo-style keep-away with 4–5 players. The Coerver methodology recommends 10,000+ ball mastery repetitions before age 12 as the threshold for genuine ball “feel” — that sounds like a lot, but 20 minutes of daily ball mastery work accumulates those reps faster than you’d think. Cone weaving is the ideal next step after basic ball mastery: it introduces movement, direction change, and spatial awareness in a low-pressure format that beginners find genuinely fun once they start to improve. Avoid introducing passing drills too early for absolute beginners — establish the individual ball relationship first. For more youth-specific training ideas, including team mottos and session structure tips, the resource on youth soccer mottos and team culture can help coaches build the right environment alongside the technical work.
Can I do these drills indoors?
Yes — most ball mastery and first touch drills adapt well to indoor spaces. Toe taps, sole rolls, bell touches, and V-turns require only a few square meters. Wall passing works indoors against any solid flat wall, ideally on a surface where the ball rolls smoothly. The self-toss aerial control drill works in any room with enough ceiling height (roughly 10–12 feet for the chest reception variation). For indoor dribbling, replace full cone weaving runs with tight patterns in a smaller space — set up 3–4 cones in 2×3 meters and work the inside/outside transitions slowly. Indoor futsal surfaces are excellent for technical work because the harder surface demands more precise touches. Many professional academies incorporate extensive indoor ball work during winter months without any loss in technical development.
Do I need any special equipment for these drills?
No. A soccer ball and a flat surface are enough to run every ball mastery and first touch drill in this guide. For dribbling drills, 6–8 cones add significant value — they’re inexpensive and create structure that makes the drill more measurable and progressive. A wall (brick, concrete, or wooden panel) unlocks wall passing, which is arguably the highest-ROI solo drill in this guide. For players serious about tracking progress, a stopwatch or phone timer adds a competitive layer to ball mastery circuits. You don’t need a full-size ball for most of this work — a size 4 or even a smaller training ball develops touch more effectively in some contexts because it demands more precision. Make sure your ball is properly inflated; an under-inflated ball gives misleading feedback on weight and bounce that can actually develop bad touch habits. If you’re curious about official ball specifications and sizes, the complete breakdown on how much a soccer ball weighs by size covers everything from youth sizes to professional match balls.
How do I adapt these drills for a small group or team?
Most drills in this guide convert to small-group formats with minor adjustments. Wall passing becomes a three-player passing triangle: Player A passes to B, B one-touches to C, C passes back to A — rotate every 2 minutes. Cone weaving works as a relay: teams of 3–4 race through the course; the competition element adds pressure without adding complexity. The Gates Passing drill scales to 3v1: two outer players pass through gates while one defender tries to block; the outer player who misses the gate becomes the new defender. For larger groups (8–12 players), run two Rondo squares simultaneously and rotate players between groups every 4 minutes. Constraints-led games — shrinking the Rondo square, reducing touch limits, adding time pressure — are the most effective way to increase difficulty without adding new drills.
Wrapping Up
Ball mastery is your daily non-negotiable. Five drills, five minutes as a warm-up — this is the foundation under everything else. Research consistently shows that 15–20 minutes of structured ball mastery daily produces measurable gains in first-touch accuracy and neural processing speed within 6–8 weeks.
Anticipation, not reaction, defines elite first touch. The 0.4-second pre-movement window documented by University of Tsukuba research is trainable. Wall passing progressions and self-toss aerial drills build exactly that anticipatory positioning habit.
Dribbling technique breaks down without progressive stages. Go through all four stages in sequence. Stage 4 head-up dribbling only works if Stages 1–3 are automatic. Skipping stages produces inconsistent match performance.
Passing quality is a shared responsibility. The weight and direction of your pass determines your teammate’s first touch. Partner Passing phases, Gates Passing, and Rondo build the accuracy habits that make the whole team more dangerous in possession.
Track your numbers. Progress in technical training is measurable — consecutive one-touch passes, cone weave error rate, sprint times with the ball. Without measurement, you’re practicing without direction.
Every drill in this guide connects back to the same principle: repetition under focus builds automaticity, and automaticity frees your mind to play the game rather than manage the ball. Start with ball mastery as your daily foundation. Layer in first touch work and wall passing. Progress to cone weaving and explosive sprints. Run Rondos whenever you have 3+ players available.
The gap between a player who “has good feet” and one who is genuinely technically dominant almost always comes down to how many deliberate, focused ball touches they got before age 16. Start now. The sessions are short. The compounding effect is real.